How to install NodeBB on your local computer (Windows) in 2024
NodeBB is an open-source forum software platform built on Node.js, utilizing web technologies such as JavaScript, HTML5, and CSS3. It is designed to be highly customizable, offering a modern and dynamic forum experience.
As NodeBB is an open-source software platform, it can be forked using Github. The source code for the documentation portal is found in the GitHub repository. This tutorial is a guide to the installation of NodeBB with MongoDB on Computer.
System requirements
- Memory: Installing NodeBB’s dependencies may require more than 512 megabytes of system memory.
Installing node js
As mentioned above, NodeBB is built on Node.js. so Node.js must be installed before installing NodeBB.
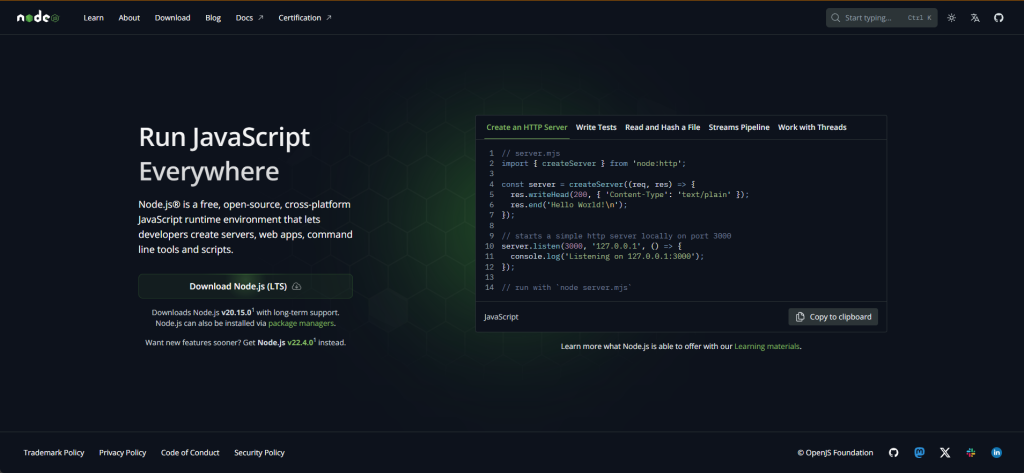
- Navigate to Node.js official website and Download Node.js LTS.
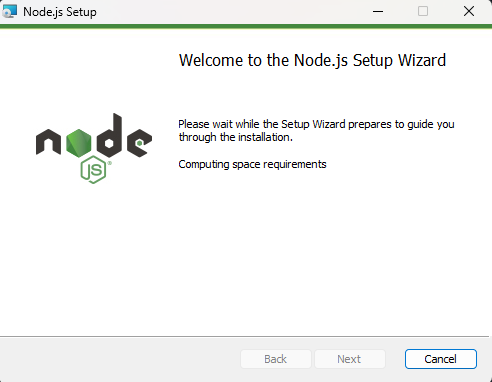
- Execute the installer and complete the setup
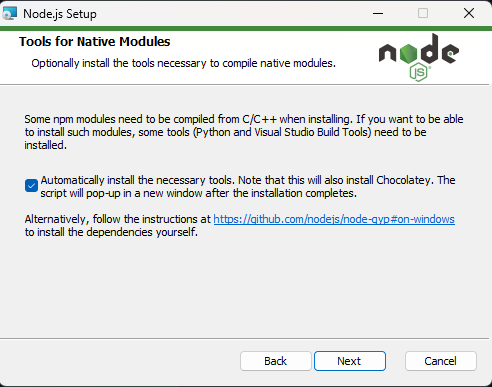
- Continue with the installation, following the recommended settings. Make sure to tick on the Tools for Native Modules section to automatically install the necessary tools.
- Continue with the remaining steps and complete the installation of the Node.js setup.
- Verify the Installation of Node.js and npm. Make sure to install the lts version of node.js and npm version 10.
node -v
npm -v
Installing MongoDB
MongoDB is the default database for NodeBB. This guide contains the latest installation instructions to install MongoDB.
Installation of mongodb community server
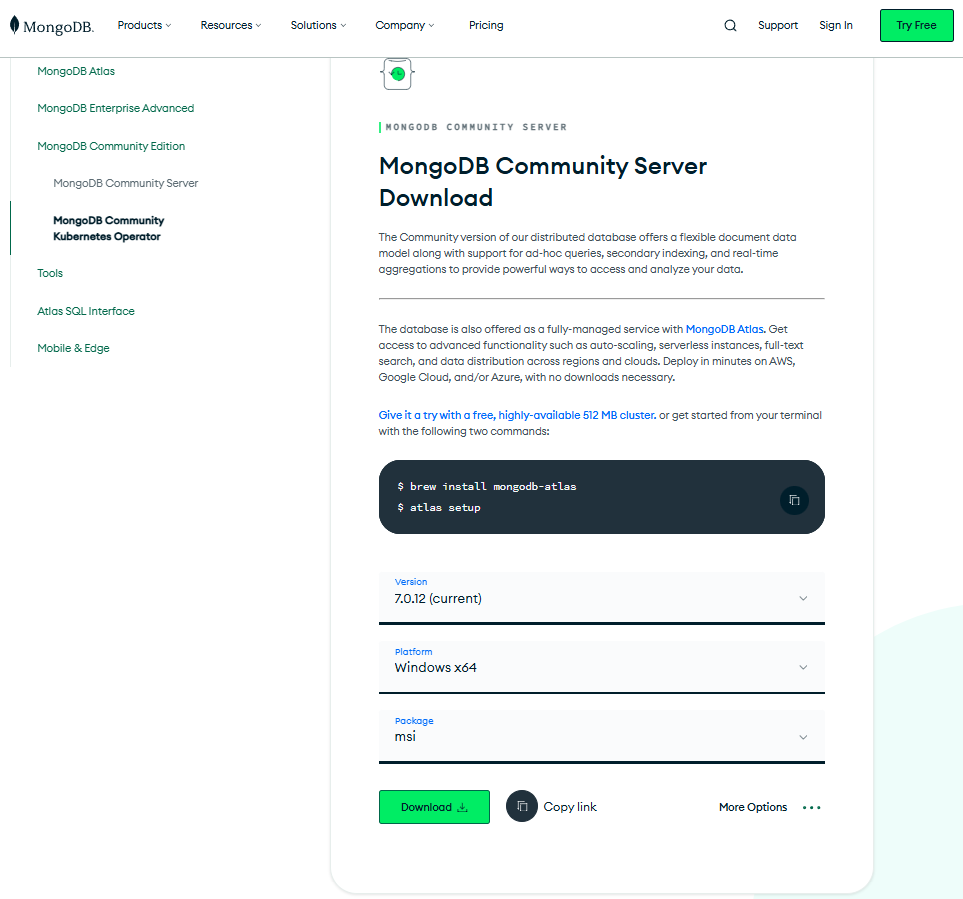
- First, navigate to the MongoDB Download Center and download the setup file for MongoDB Community Edition.
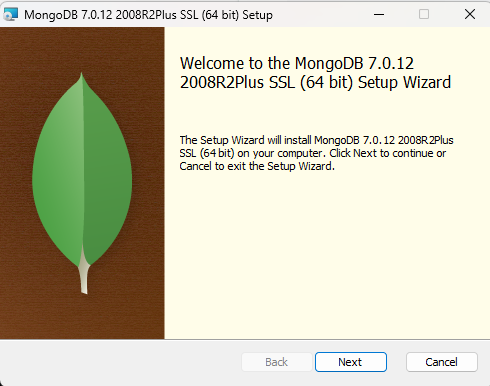
- Execute the downloaded .msi file and proceed with the installation.
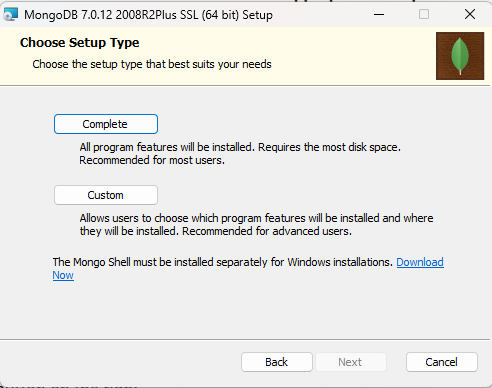
- Keep the Recommended settings for the next stages and, in the “Choose Setup Type” screen, Select Complete, to install all the features and Next.
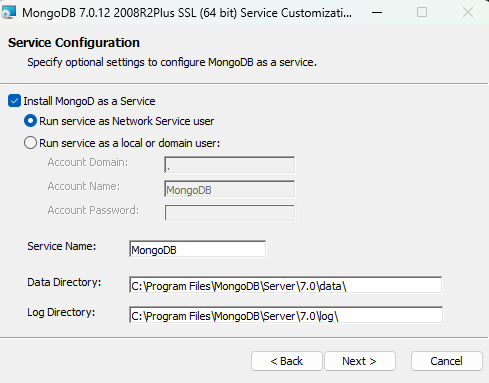
- In the next screen, make sure to select Install MongoD as a Service and Click on Next. (Leave the other settings as it is).
- Continue with the remaining steps and complete the installation of the MongoDB Community Server.
INSTALLATION OF MONGODB compass and mongodb shell
- This is an optional application. Navigate to MongoDB Compass and Download the setup.
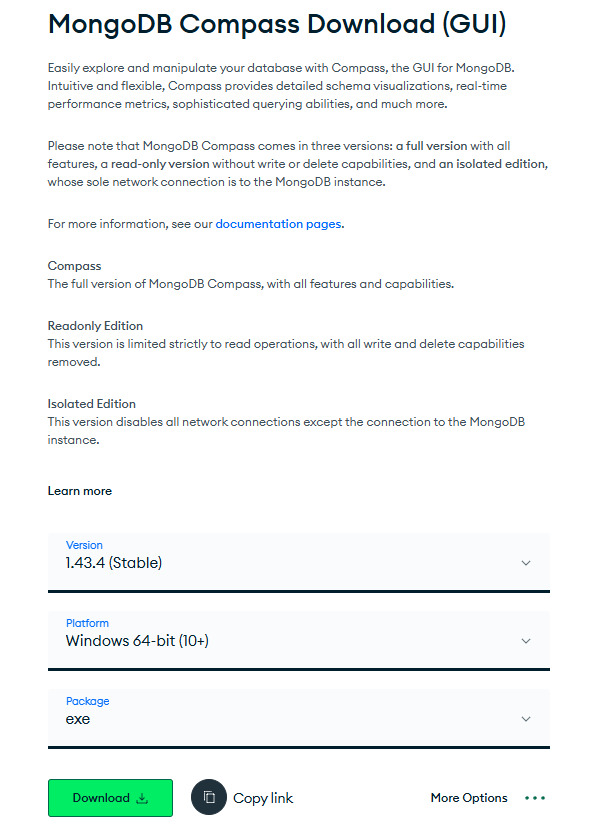
- Open the setup and follow the installation accordingly.
- Once the installation is complete, Navigate to the MongoDB Shell download page. Make sure to select the .msi and download to proceed with the setup file of the MongoDB shell.
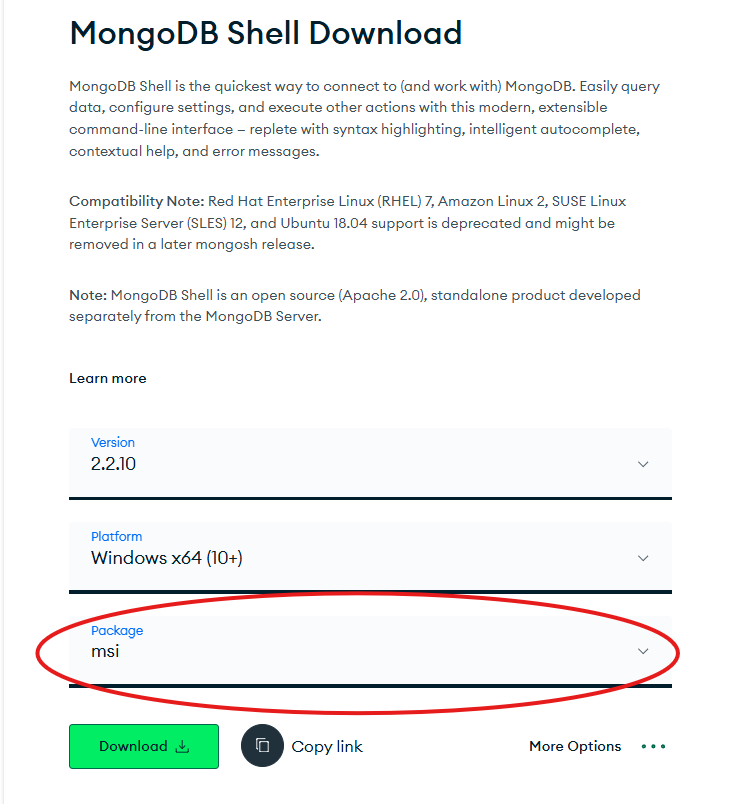
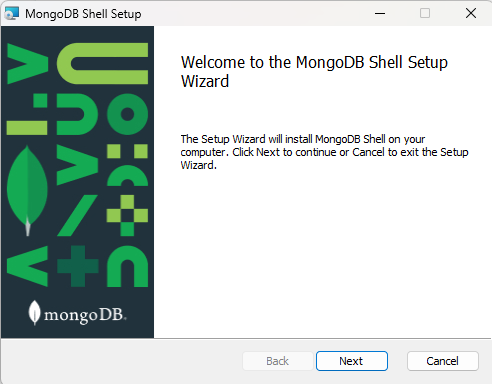
- Execute the downloaded setup file and proceed with the installation.
Adding mongodb Binaries to the path
Now that all the necessary installations are completed, Binaries must be added to the path.
- Navigate to the directory of the MongoDB. (Default Location is C:\Program Files\MongoDB\Server\7.0)
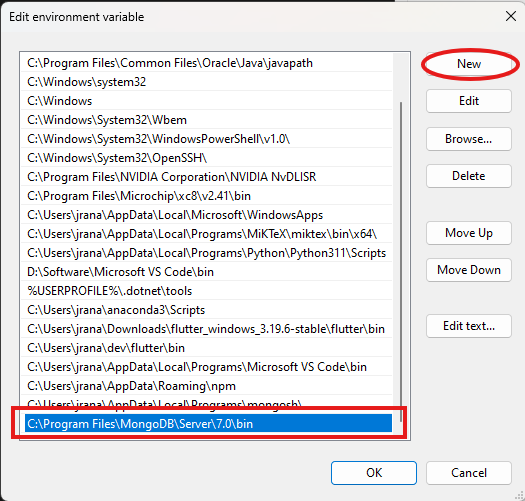
- Find the bin directory under the MongoDB installation folder and copy the path. (Default Path is C:\Program Files\MongoDB\Server\7.0\bin)
- Copying the file path can be done by double-clicking on the file path on top of the File Explorer.

- Type PATH on the Start Menu search bar.
- Select edit the systems environmental variables and click on Environment Variables.
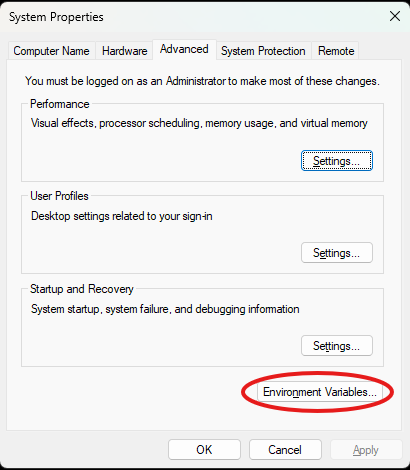
- Under the User Variables for [Your Username], click on Path and Click Edit.
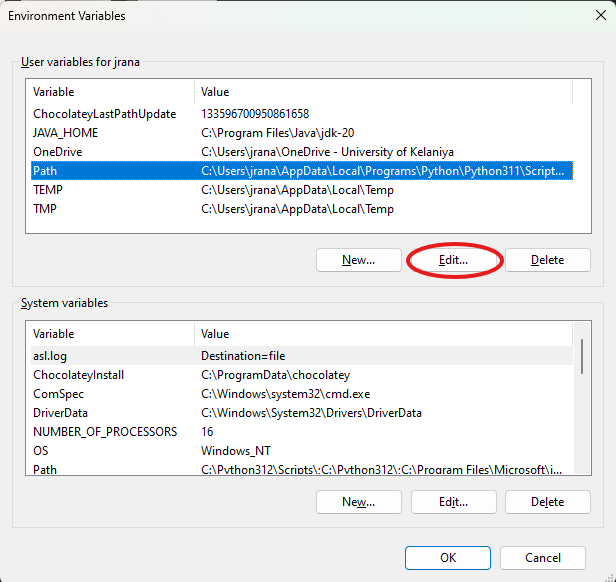
- Click on New button and Type or Paste the full path to the bin directory and click OK.
Configure a service for the mongod server
- Open the Windows Powershell.
- Now two directories must be created for the database and log files. C:\MongoDB\data\db and C:\MongoDB\logs are used for the database and log files in this tutorial.
- Create a config file to define those paths.
systemLog:
    destination: file
    path: C:\MongoDB\logs\mongod.log
storage:
dbPath: C:\MongoDB\data\db- Install the MongoDB service by executing the following command in the Command Prompt.
mongod.exe --config "C:\MongoDB\mongod.cfg" --install- Verify the installation of MongoDB.
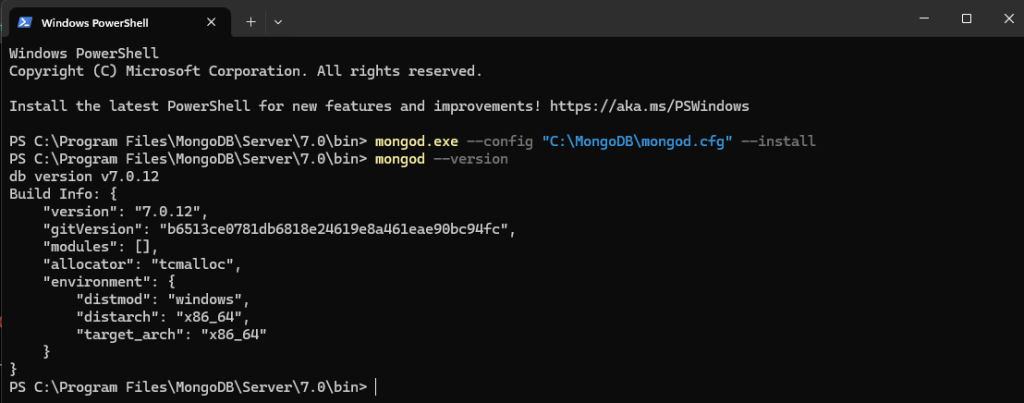
- Start the mongod service and verify the status.

configure MongoDB
- Access the MongoDB shell :
mongosh- Switch to the admin database :
use admin- create an administrative user with a secure password. (replace the placeholder for the password with your own password. )
db.createUser( { user: "admin", pwd: "", roles: [ { role: "root", db: "admin" } ] } )
- create a new database called nodebb. (to initially create a database, simply use it.)
use nodebb- After the above command, the database will be switched. Now create a nodebb user with the following command. replace the placeholder for the password as before.
db.createUser( { user: "nodebb", pwd: "", roles: [ { role: "readWrite", db: "nodebb" }, { role: "clusterMonitor", db: "admin" } ] } )
Here, the readWrite permissions enable the user to store and retrieve data from the nodebb database. The clusterMonitor permissions allows the database to have read-only access to the query database server statistics.
- Once the shell the user is created, exit the shell.
quit()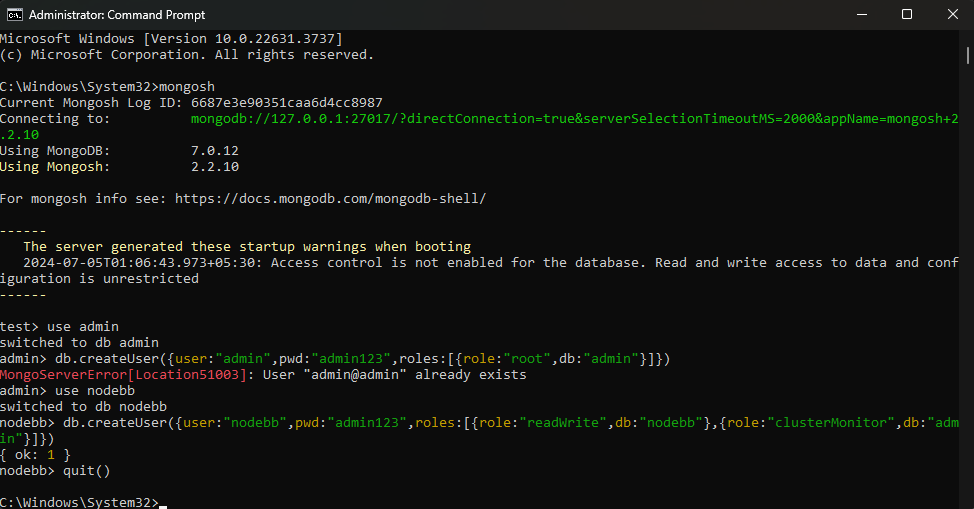
- Now, database authorisation in the MongoDB configuration must be enabled. Do the changes according to the images below.
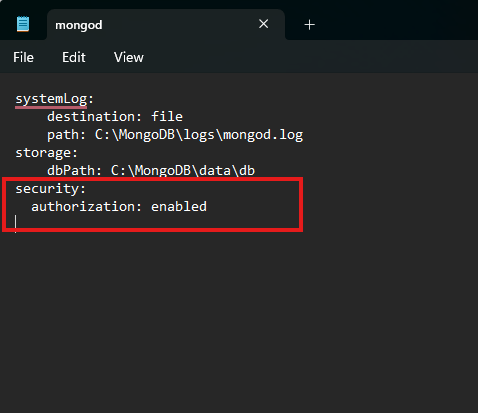
- Add the following lines to the mongod.cfg file on C:\MongoDB\mongod.cfg
security:
  authorization: enabled
- Stop and Restart MongoDB server and verify the it can still be connected.
net stop MongoDB
net start MongoDB

Installing NodeBB
- To install NodeBB, git must be installed to clone the repository.
- Donwload Git for Windows here.
- Execute the setup file and install Git by following the instructions given in the installation setup.
- In the Setup, make sure to select the Use Git from the Windows Command Prompt option to configure the environment PATH to use git.
- It is advised not to use commands like git and ./nodebb with administrative privileges as it will cause problems with different ownership of files.
- Now, navigate to a suitable directory and open the command prompt to clone the git repository to that directory. use the command to clone.
git clone -b v3.x https://github.com/NodeBB/NodeBB.git
cd nodebb
- Once the cloning is done, use the following command to proceed with the NodeBB setup.
nodebb setup
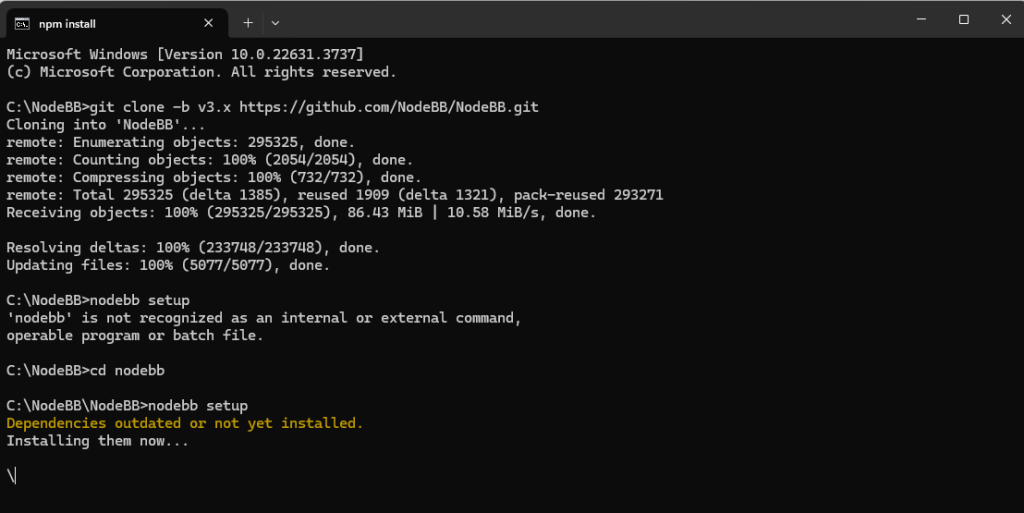
- Wait until the installation is complete, and once done, a series of questions will be asked.
- These questions will contain default values in parentheses and will be asked by the user to press enter to confirm the default values or enter manually.
- For windows, default setting value for local server listening port is 4567 and MongoDB port listening on port 27017.
- In this tutorial, it is recommended to use the default values until the question asked for mongoDB username and password.
- Enter nodebb and the password set by the user earlier.
- If no administrator was detected, initial user setup will be prompted and the user will be able to create an administrator account and the setup will be completed.
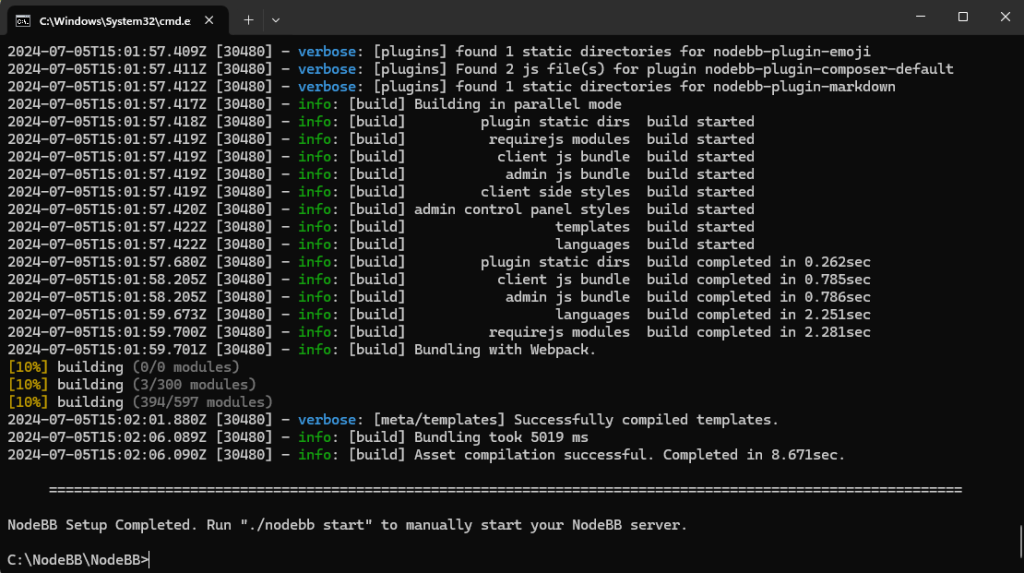
- Now, NodeBB can be started by entering the following command in the Command Prompt.
nodebb start

Installing nginx
At default, NodeBB must need a port number and a hostname (eg: http://example.org :4567 ) to gain access. NodeBB default runs on port 4567. In order to enable NodeBB access the server without establishing a connection with the port number, nginx can be setup to proxy all the request to a particular subdomain or hostname to an Upstream nodeBB server running on any port.
Follow the below steps to install Nginx on Windows PCs.
- Create a directory called “C:\nginx”.
- Download the latest version available from the nginx website
- The download file will be .zip file. once downloaded, navigate to the zip folder.
- Copy all the content inside the file and paste inside of “C:\nginx”.
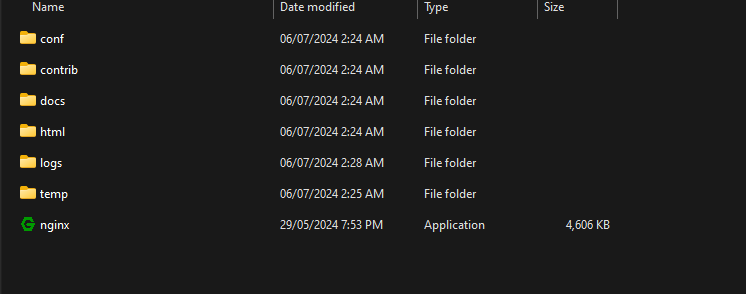
- Now, right-click anywhere (not on folders) on the directory and select “Open in Terminal”.
- to verify the installation enter the following command on the Command Prompt.
.\nginx -v- to start the services and check the active tasks, enter the commands as below.
start nginx
tasklist /fi "imagename eq nginx.exe"
Configure Nginx
- To configure the nginx, navigate to the following path and open nginx.conf file as edit in notepad.
C:\nginx\conf- In this tutorial, a sample server block is provided.
server {
    listen 80;

    server_name forum.example.com;

    location / {
        proxy_set_header X-Real-IP $remote_addr;
        proxy_set_header X-Forwarded-For $proxy_add_x_forwarded_for;
        proxy_set_header X-Forwarded-Proto $scheme;
        proxy_set_header Host $http_host;
        proxy_set_header X-NginX-Proxy true;

        proxy_pass http://127.0.0.1:4567;
        proxy_redirect off;

        # Socket.IO Support
        proxy_http_version 1.1;
        proxy_set_header Upgrade $http_upgrade;
        proxy_set_header Connection "upgrade";
    }
}
- Once done, save and exit.
- Next, you have to reload the service to see the changes.
cd C:\nginx
.\nginx -s reload
Conclusion
The Installation of the NodeBB is now complete. The forum is up and running and ready for the users. Remember to regularly check for updates and new plugins too keep the forum secure and feature-rich. Engage with the NodeBB community for support and inspiration. Happy forum building!


